A tent can look completely fine until the first heavy rain of the season finds the one seam or panel that has quietly stopped doing its job. Water starts coming through the floor, or a damp patch appears on the inside of the rainfly, and by then you are already wet and wondering what went wrong.
Table of Contents
The good news is that this is almost always fixable, and it is usually cheaper and faster than most people expect. Tents do not fail all at once. The waterproof coating wears down gradually through sun exposure, folding, and general use, and the seams are usually the first place to give out because every stitch is a small hole punched through the fabric.
This guide explains exactly how tent waterproofing works, how to tell when yours needs attention, and the full process for reproofing the fabric and resealing the seams yourself. It also covers waterproofing differences by fabric type, whether a tarp over your tent actually helps, and what to do if your tent starts leaking in the middle of a trip.
Prefer to watch first? REI’s gear team walks through the full waterproofing refresh process in a few minutes.
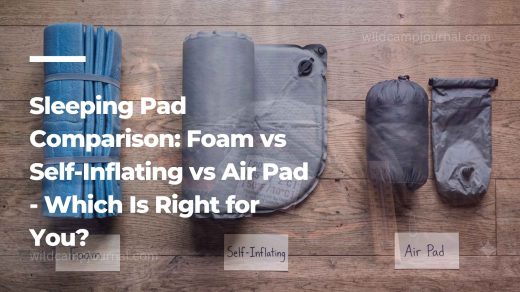
How to Waterproof a Tent: How it Actually Works
Most modern tents rely on two separate layers of protection working together, and understanding both is the key to fixing the right problem.
The first layer is the coating bonded to the inside of the fabric itself, usually polyurethane or silicone. This coating is the actual waterproof barrier. It is what stops rain from soaking straight through the weave of the nylon or polyester. This is the layer that is measured in the hydrostatic head rating you see on tent specifications, covered in more detail in our tent buying guide.
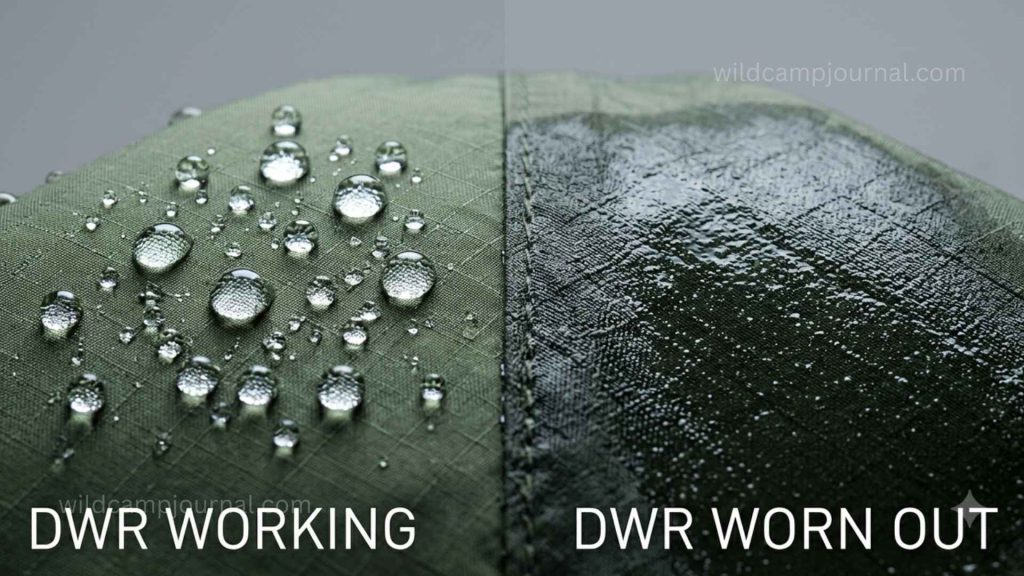
The second layer is the Durable Water Repellent treatment, known as DWR, applied to the outside of the fabric. DWR does not stop water from passing through fabric on its own. Its job is to make water bead up and roll off the surface instead of soaking in and saturating the material. When DWR wears off, the fabric can still technically be waterproof underneath, but it gets heavy, cold, and damp feeling because the outer layer is absorbing water like a sponge before it has a chance to run off.
Cotton and polycotton canvas tents work differently from synthetic tents. Canvas does not use a polyurethane coating. Instead, the cotton fibers themselves swell slightly when wet, which naturally tightens the weave and closes any gaps. This is why a genuine canvas tent rarely needs reproofing in the way a nylon tent does, and applying the wrong product to canvas can actually interfere with this natural process.
Signs Your Tent Needs Reproofing
Before reaching for any product, it helps to know exactly what you are looking for, because treating a tent that does not need it wastes time and product, and missing a real problem means getting wet on your next trip.
The water bead test. Set the tent up, or lay the rainfly flat, and spray it with a hose or watering can. On healthy DWR, water forms into beads and rolls straight off the fabric. If the water instead darkens the fabric and soaks in flat, the DWR coating has worn off and needs reapplying.
Flaking or tacky coating on the inside. Turn the rainfly inside out and run your hand over the coated side. If you see small flakes coming away, or the fabric feels sticky and clings to itself when folded, the underlying polyurethane coating is breaking down. This is a different problem from DWR wearing off, and it needs a urethane recoat rather than a simple spray.

Visible damp patches inside during rain. If you notice condensation versus an actual wet patch with a defined edge, that defined edge usually marks exactly where a seam, a pinhole, or a worn coating area is letting water through.
Seam tape peeling at the edges. Check the underside of the rainfly and the inside of the floor seams. If the factory tape is lifting or curling away from the fabric, water will find its way through the stitching holes underneath.
Are tents waterproof when new straight out of the box. Yes, but the rating only describes the day it left the factory. UV exposure, repeated folding, and general wear reduce that performance steadily over time regardless of how careful you are.
How Often Should You Waterproof a Tent
This depends on which layer needs attention, since DWR and the internal coating wear out at very different rates.
DWR coating typically needs renewal after roughly 10 to 15 outings for regular campers, or once a season for anyone camping more frequently than that. It is the part that wears out fastest because it is the outermost layer taking the most direct exposure to sun, dirt, and abrasion.
Seam tape and the internal polyurethane coating last considerably longer. Most tents only need their seams manually resealed every three to five years, depending on storage conditions, how much UV exposure the tent gets, and how often it is used. Silicone-coated fabrics are the exception here. Silicone treatment is far more durable than polyurethane and rarely needs reproofing at all under normal use.
The honest answer to whether it is worth re-waterproofing an older tent is almost always yes, provided the fabric and zippers are otherwise in good condition. Reproofing a tent costs a fraction of replacing it and can restore years of useful life, especially compared to buying new.
How to Reproof Your Tent’s DWR Coating Step by Step
This is the process for refreshing the outer water repellent layer, which is the most common waterproofing task and the one most campers need to do regularly.
Step 1: Clean the tent first. Dirt, sap, and body oils prevent new DWR from bonding properly to the fabric. Wash the rainfly and tent body with cold water and a mild, non-detergent soap designed for technical fabrics. Avoid regular laundry detergent, which can leave a residue that blocks the new coating.
Step 2: Let it dry, or apply while damp depending on the product. Some DWR products are designed to go on wet fabric, others require a dry surface. Check the label on whichever product you have bought, since this step varies between brands.
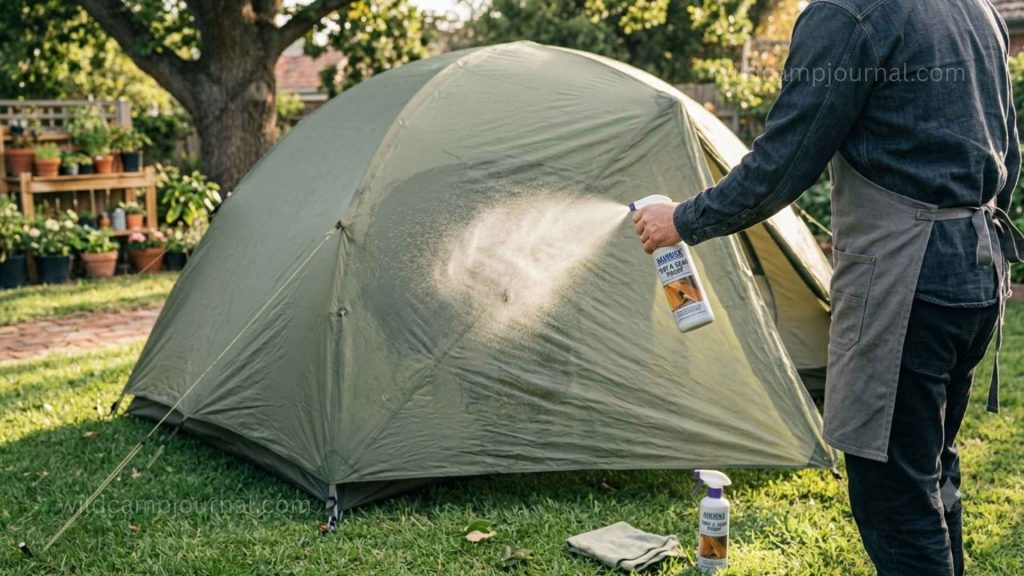
Step 3: Set up the tent in a well-ventilated outdoor space. Pitch the tent fully so the fabric is taut and every panel is accessible, rather than trying to treat it while it is flat or folded.
Step 4: Apply the DWR evenly. Spray-on products are applied directly to the exterior of the rainfly in slow, even passes, covering the whole surface including seams and edges. Wash-in products are added during a wash cycle instead, which can be more even but requires a large enough washing machine or a bathtub for hand washing.
Step 5: Wipe off any excess. After a couple of minutes, go over the surface with a clean, damp cloth to remove any pooling or excess product that has not absorbed.
Step 6: Allow full drying time before packing away. Most DWR treatments need at least a few hours, and some recommend a full 24 hours, before the tent should be folded and stored. Packing it away too early can prevent the coating from curing properly.
How to Seam Seal a Tent Step by Step
Seams are usually the first place a tent starts to leak, because every stitch punches a small hole through the waterproof fabric. Most tents come with factory-sealed seams, but that factory tape or sealant eventually wears out.
Step 1: Identify which seams need attention. Pitch the tent with the rainfly turned inside out for easier access, since most of the critical seams are sewn on the underside of the fly and the inner side of the floor. Look specifically for tape that is peeling, cracking, or has visible gaps.
Step 2: Clean the seam area. Use a rag with a small amount of rubbing alcohol to remove dirt, oils, and any loose flaking material from the seam before applying new sealer. This step is often skipped, and it is the main reason a fresh seam seal fails to bond properly.
Step 3: Choose the correct sealer for your fabric. This step matters more than most people realise. Silicone-treated fabric needs a silicone-based sealer. Polyurethane-coated fabric, which is the most common type on budget and mid-range tents, needs a polyurethane-based sealer instead. Using the wrong type can result in a seal that never fully cures or that fails to bond at all.
Step 4: Apply a thin, even coat. Using the built-in brush applicator or a small disposable brush, run a thin line of sealer directly over the stitching, covering the full length of the seam. A thick application is not stronger, it just adds unnecessary weight and takes longer to cure.

Step 5: If one seam has failed, check them all. A seam that is starting to fail is usually a sign the rest of the tent is reaching the same age and exposure level. It is often worth treating every major seam at the same time rather than waiting for each one to fail individually.
Step 6: Allow proper cure time. Most seam sealers need 12 to 24 hours to cure fully, depending on temperature and humidity. Packing the tent away before this is complete can damage the fresh seal before it has set.
Want to see the technique in action? This video demonstrates the full seam sealing process from start to finish.
Waterproofing by Fabric Type
Not every tent fabric is treated the same way, and using the wrong product can do more harm than good.
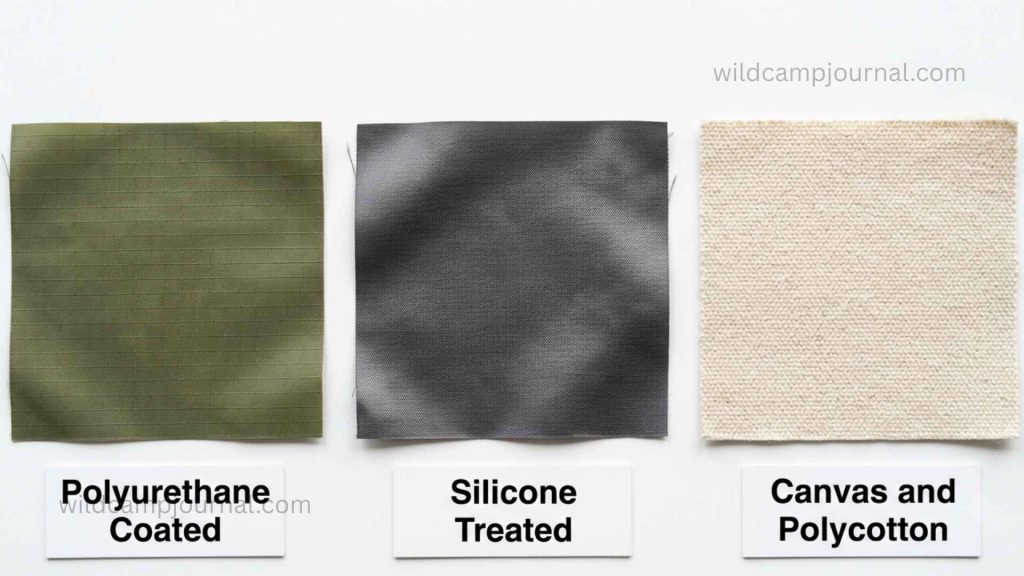
Polyurethane-coated nylon or polyester. This is the most common fabric type on budget and mid-range tents. It uses a urethane coating on the inside combined with DWR on the outside, and both layers degrade over time. Products labeled for polyurethane-coated fabric are required here, since silicone-based products will not bond properly.
Silicone-treated fabric, often called silnylon or silpoly. Common on lightweight backpacking tents. The silicone is impregnated into the fibers rather than sitting as a surface coating, which makes it more durable and less prone to flaking. Only silicone-based sealers work correctly on this fabric type, and standard polyurethane seam sealers will not adhere.
Canvas and polycotton. These fabrics are naturally water resistant once seasoned, through the swelling of the cotton fibers when wet. They generally do not need DWR spray or seam sealing in the way synthetic tents do. If a canvas tent does start leaking, the more likely cause is wear at the stitching itself rather than a failed coating, and a wax-based canvas treatment is the appropriate product rather than a synthetic DWR spray.
Should You Put a Tarp Over Your Tent in Heavy Rain
This is a genuinely useful technique, but only when done correctly. A tarp suspended above your tent, not touching it, adds an extra layer of weather protection on top of whatever waterproofing your tent already has. It also blocks direct UV exposure, which is one of the main causes of long-term coating breakdown in the first place, and it can extend a dry porch area outside your tent door.
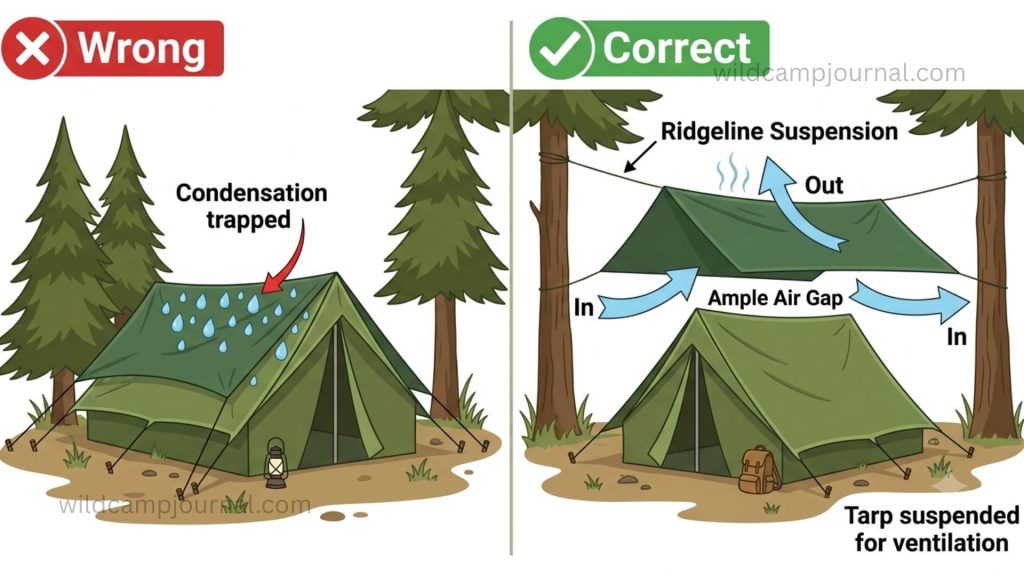
The single most important rule is that the tarp must be suspended above the tent with a clear air gap, never draped directly onto the tent fabric like a blanket. A tarp resting directly on the tent traps moisture between the two layers, dramatically increases condensation, and can even cause the roof to sag or collapse under pooled rainwater.
For the complete step by step process of rigging a tarp correctly, including the exact ridge line height and corner staking method, see our full tarp shelter setup guide. That guide covers tarp-over-tent rigging in full detail, including how to do it without trees using trekking poles.
How to Fix a Leaking Tent at the Campsite
Sometimes a leak shows up mid-trip with no time for a proper reseal. Here is what actually helps in the moment.
Locate the source first. Run a hand along the inside of the fabric near the wet patch during a dry spell to find the precise point water is entering, rather than guessing.
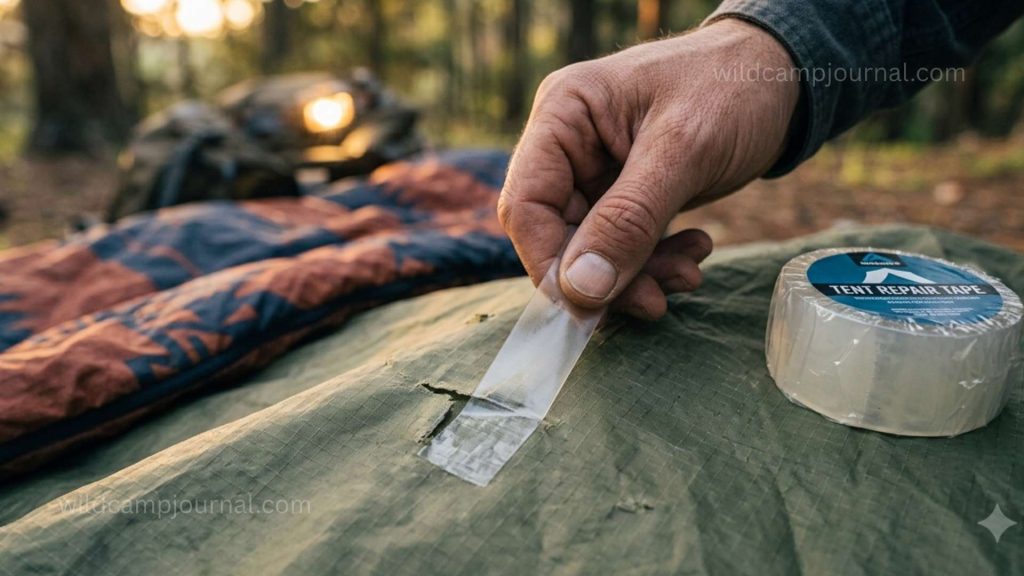
Apply repair tape as a temporary seal. A strip of waterproof repair tape, such as Tenacious Tape or similar products, pressed firmly over a pinhole or small seam gap will usually hold for the remainder of a trip.
Improvise extra coverage overhead. If the leak is coming through a worn section of the rainfly itself rather than a seam, an emergency space blanket or a spare poncho draped just above the affected area, not touching the fabric, can buy you a dry night until you can do a proper repair at home.
Redirect water at the source. For floor leaks, moving any pooling water away from the tent’s low point by digging a small channel outside the tent, where permitted, prevents standing water from building pressure against the floor seams.
None of these are permanent fixes. Treat a campsite repair as a stopgap, then do a proper DWR reproof or seam reseal once you are home.
Dealing with a budget tent that is letting water through? This video shows a low-cost fix that works on cheap tents too.
Frequently Asked Questions
Do waterproof sprays actually work?
Yes, when matched to the correct fabric type and applied to a clean, properly prepared surface. DWR sprays restore the water-beading surface effect rather than the deep waterproofing of the coating underneath, so they work best as regular maintenance rather than a fix for a tent with a genuinely failed internal coating.
Is it worth re-waterproofing an old tent?
In most cases, yes. As long as the fabric itself is not torn or rotted and the zippers still function, reproofing typically costs far less than buying a new tent and can add several more seasons of reliable use. If the fabric has become brittle or the coating is flaking extensively across the whole tent rather than in isolated spots, replacement may be the more practical choice.
Can you wash a tent in a washing machine?
Most tent manufacturers advise against machine washing, since the agitation and spin cycle can damage seams and strip protective coatings. Hand washing in a bathtub with cold water and a non-detergent technical fabric cleaner is the safer approach for both the fabric and the waterproof coatings.
Do you need to waterproof a canvas tent?
Not in the same way as a synthetic tent. Canvas becomes water resistant naturally as the cotton fibers swell when wet, tightening the weave. A dedicated canvas wax treatment can help on older or heavily used canvas, but standard DWR sprays designed for nylon are not the correct product for this fabric type.
How long does tent waterproofing spray take to dry?
Most DWR sprays need a minimum of a few hours to dry, with many manufacturers recommending a full 24 hours before the tent is packed away or exposed to rain. Drying time is faster in warm, low-humidity conditions and significantly slower in cold or damp weather.
Conclusion
Most tent leaks come down to one of two things: the outer DWR coating has worn off, or a seam has started letting water through the stitching holes. Both are straightforward and inexpensive to fix at home with the right product matched to your tent’s fabric type, and both are far cheaper than replacing the tent.
Check your tent before the season starts, not after the first leak shows up mid-trip. A water test, a look at the seam tape, and a few minutes spent on the DWR coating each year keeps a good tent performing for a decade or more.
If your tent’s fabric itself has reached the end of its life despite proper care, our guide to the best tents for car camping covers exactly what to look for in a replacement.